Initiating Kafka Clusters on Upstash
Begin your journey with Upstash by visiting Upstash and registering for an account.Kafka Cluster Creation
- After logging in, initiate the creation of a Kafka cluster by selecting the Create Cluster button.
- Input an appropriate name and select your desired deployment region, ideally close to your EMQX Cloud deployment for optimized performance.
- Choose your cluster type: opt for a single replica for development/testing or a multi-replica setup for production scenarios.
- Click Create Cluster to establish your serverless Kafka cluster.
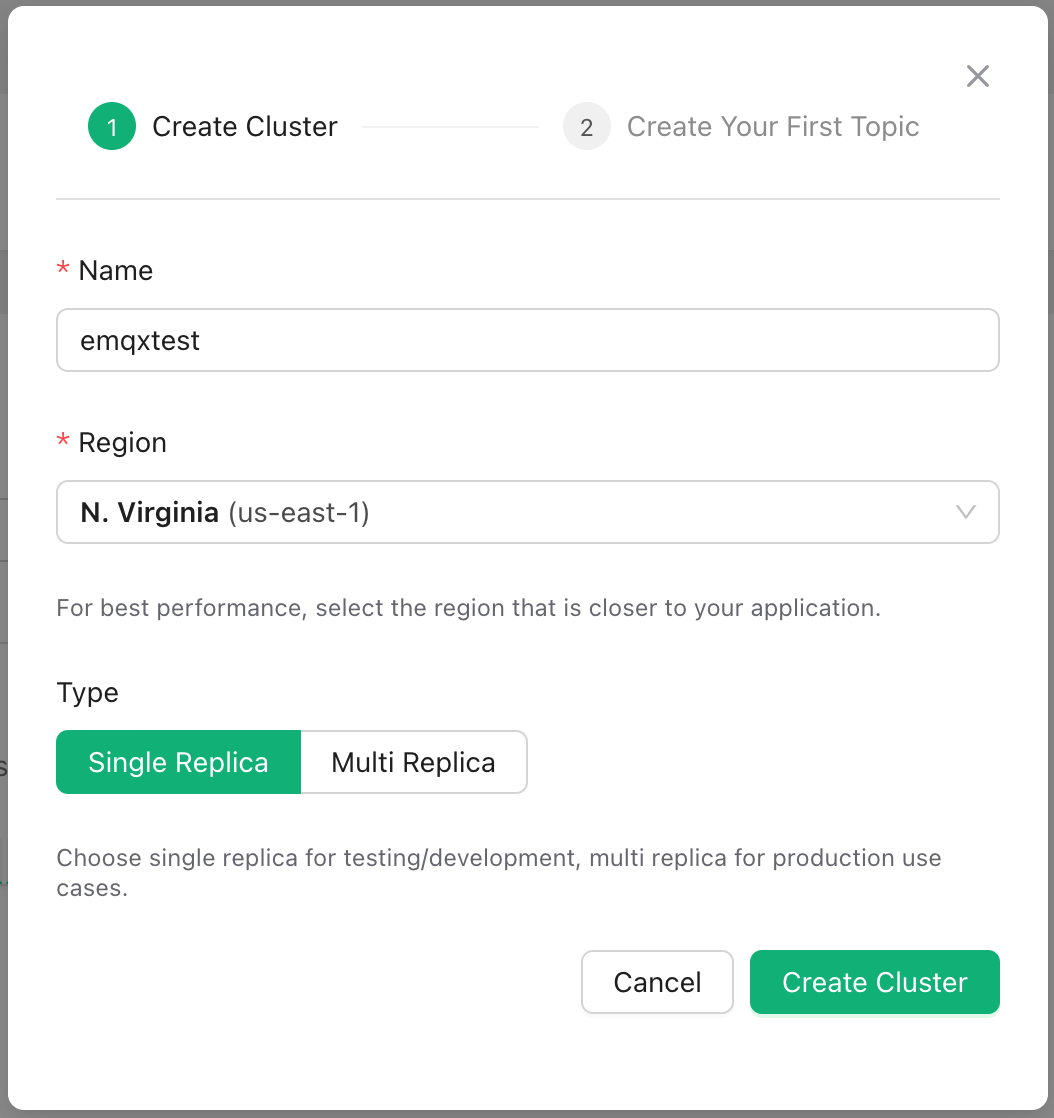
Topic Configuration
- Inside the Cluster console, navigate to Topics and proceed with Create Topic.
- Enter
emqxin the Topic name field, maintaining default settings, then finalize with Create.
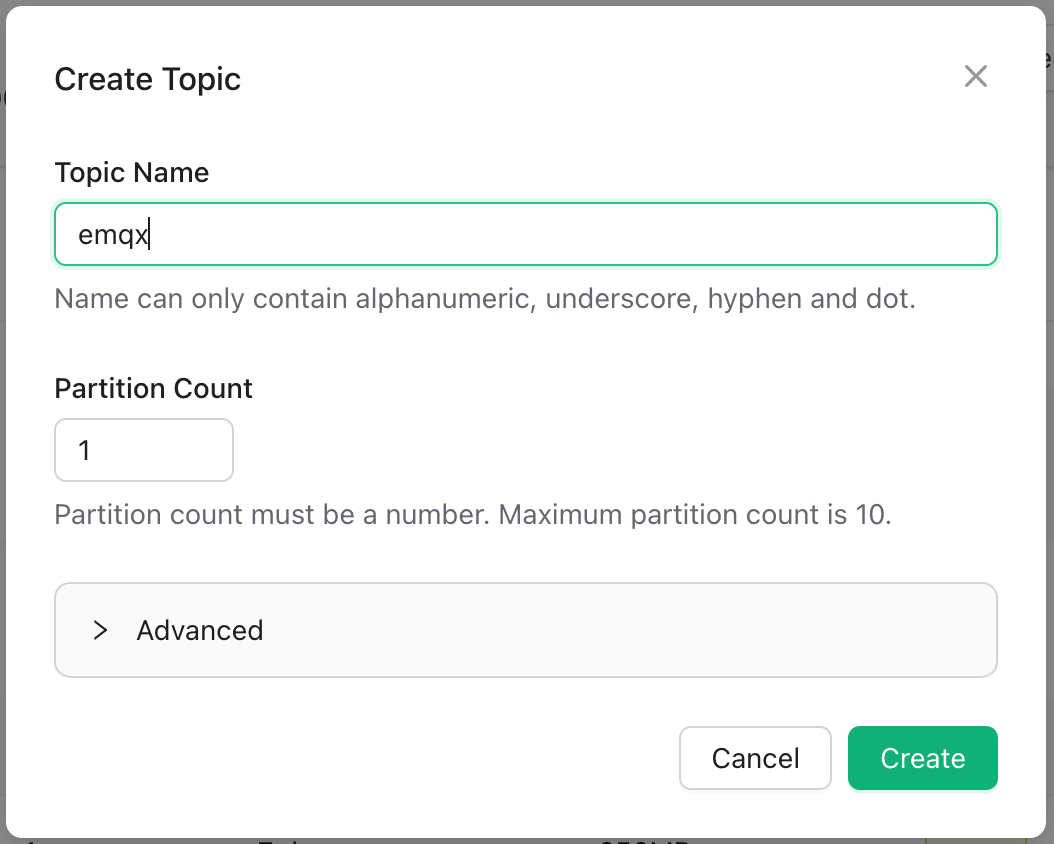
Setting Up Credentials
- Go to Credentials in the navigation menu and choose New Credentials.
- Here, you can customize the topic and permissions for the credential. Default settings will be used in this tutorial.
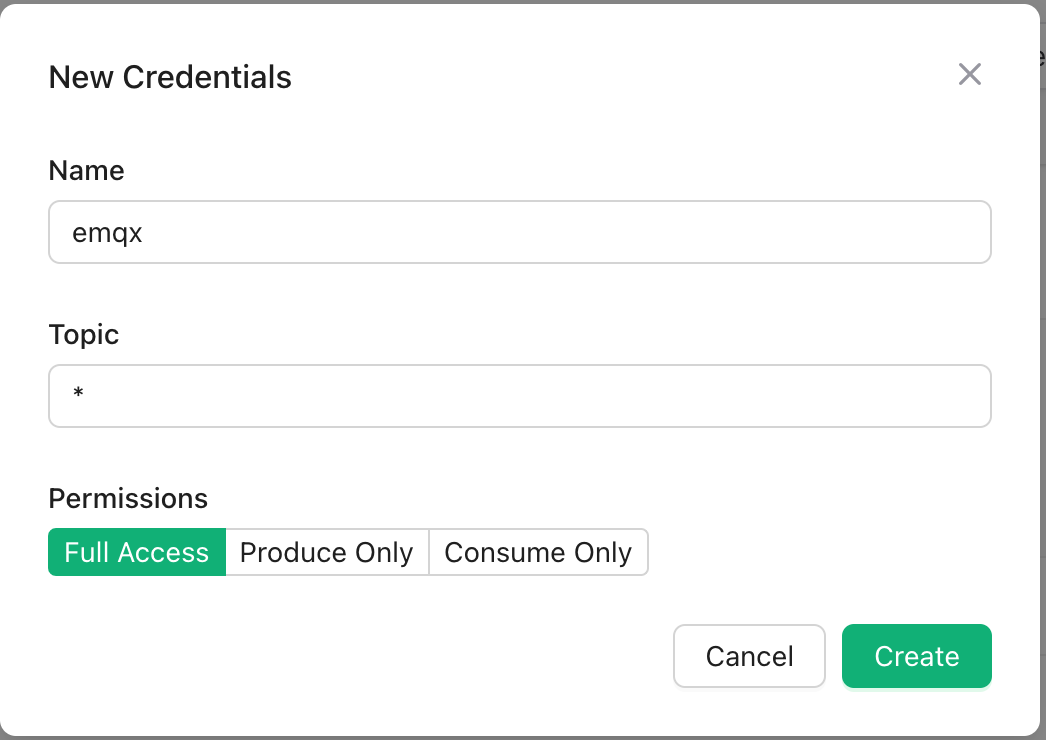 With these steps, we have laid the groundwork for Upstash.
Establishing Data Integration with Upstash
Enabling EMQX Cloud’s NAT Gateway
- Sign in to the EMQX Cloud console and visit the deployment overview page.
- Click on the NAT Gateway section at the bottom of the page and opt for Subscribe Now.
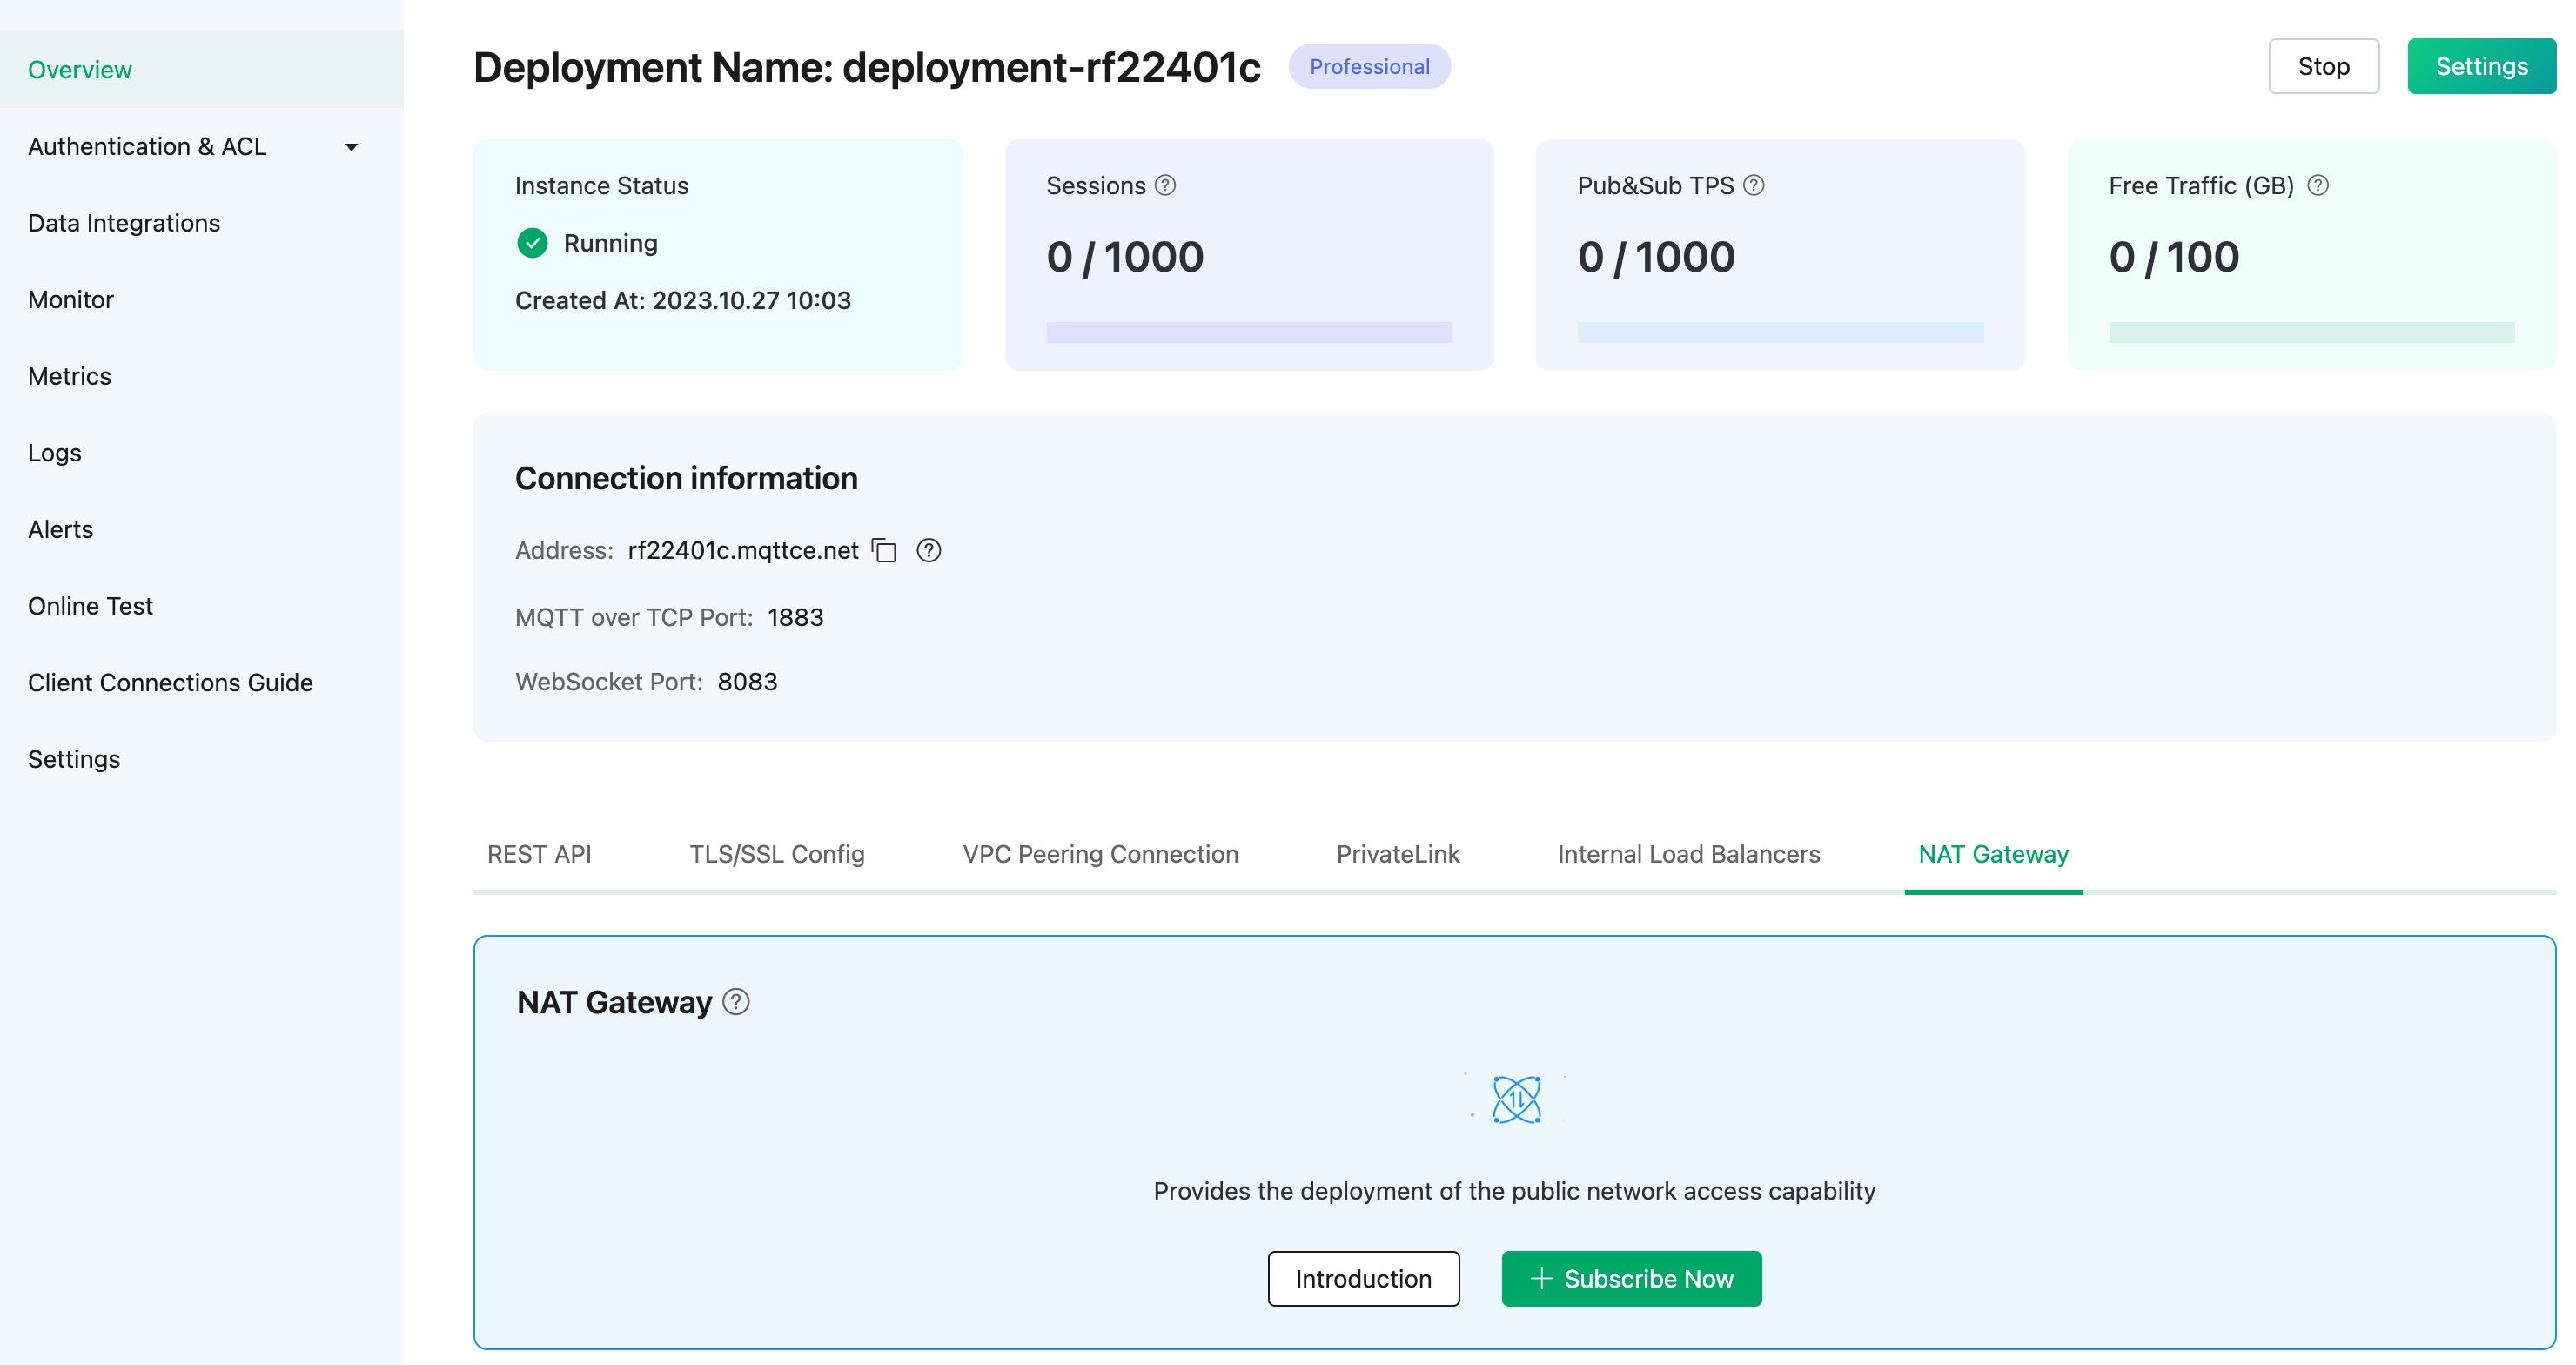
Data Integration Setup
-
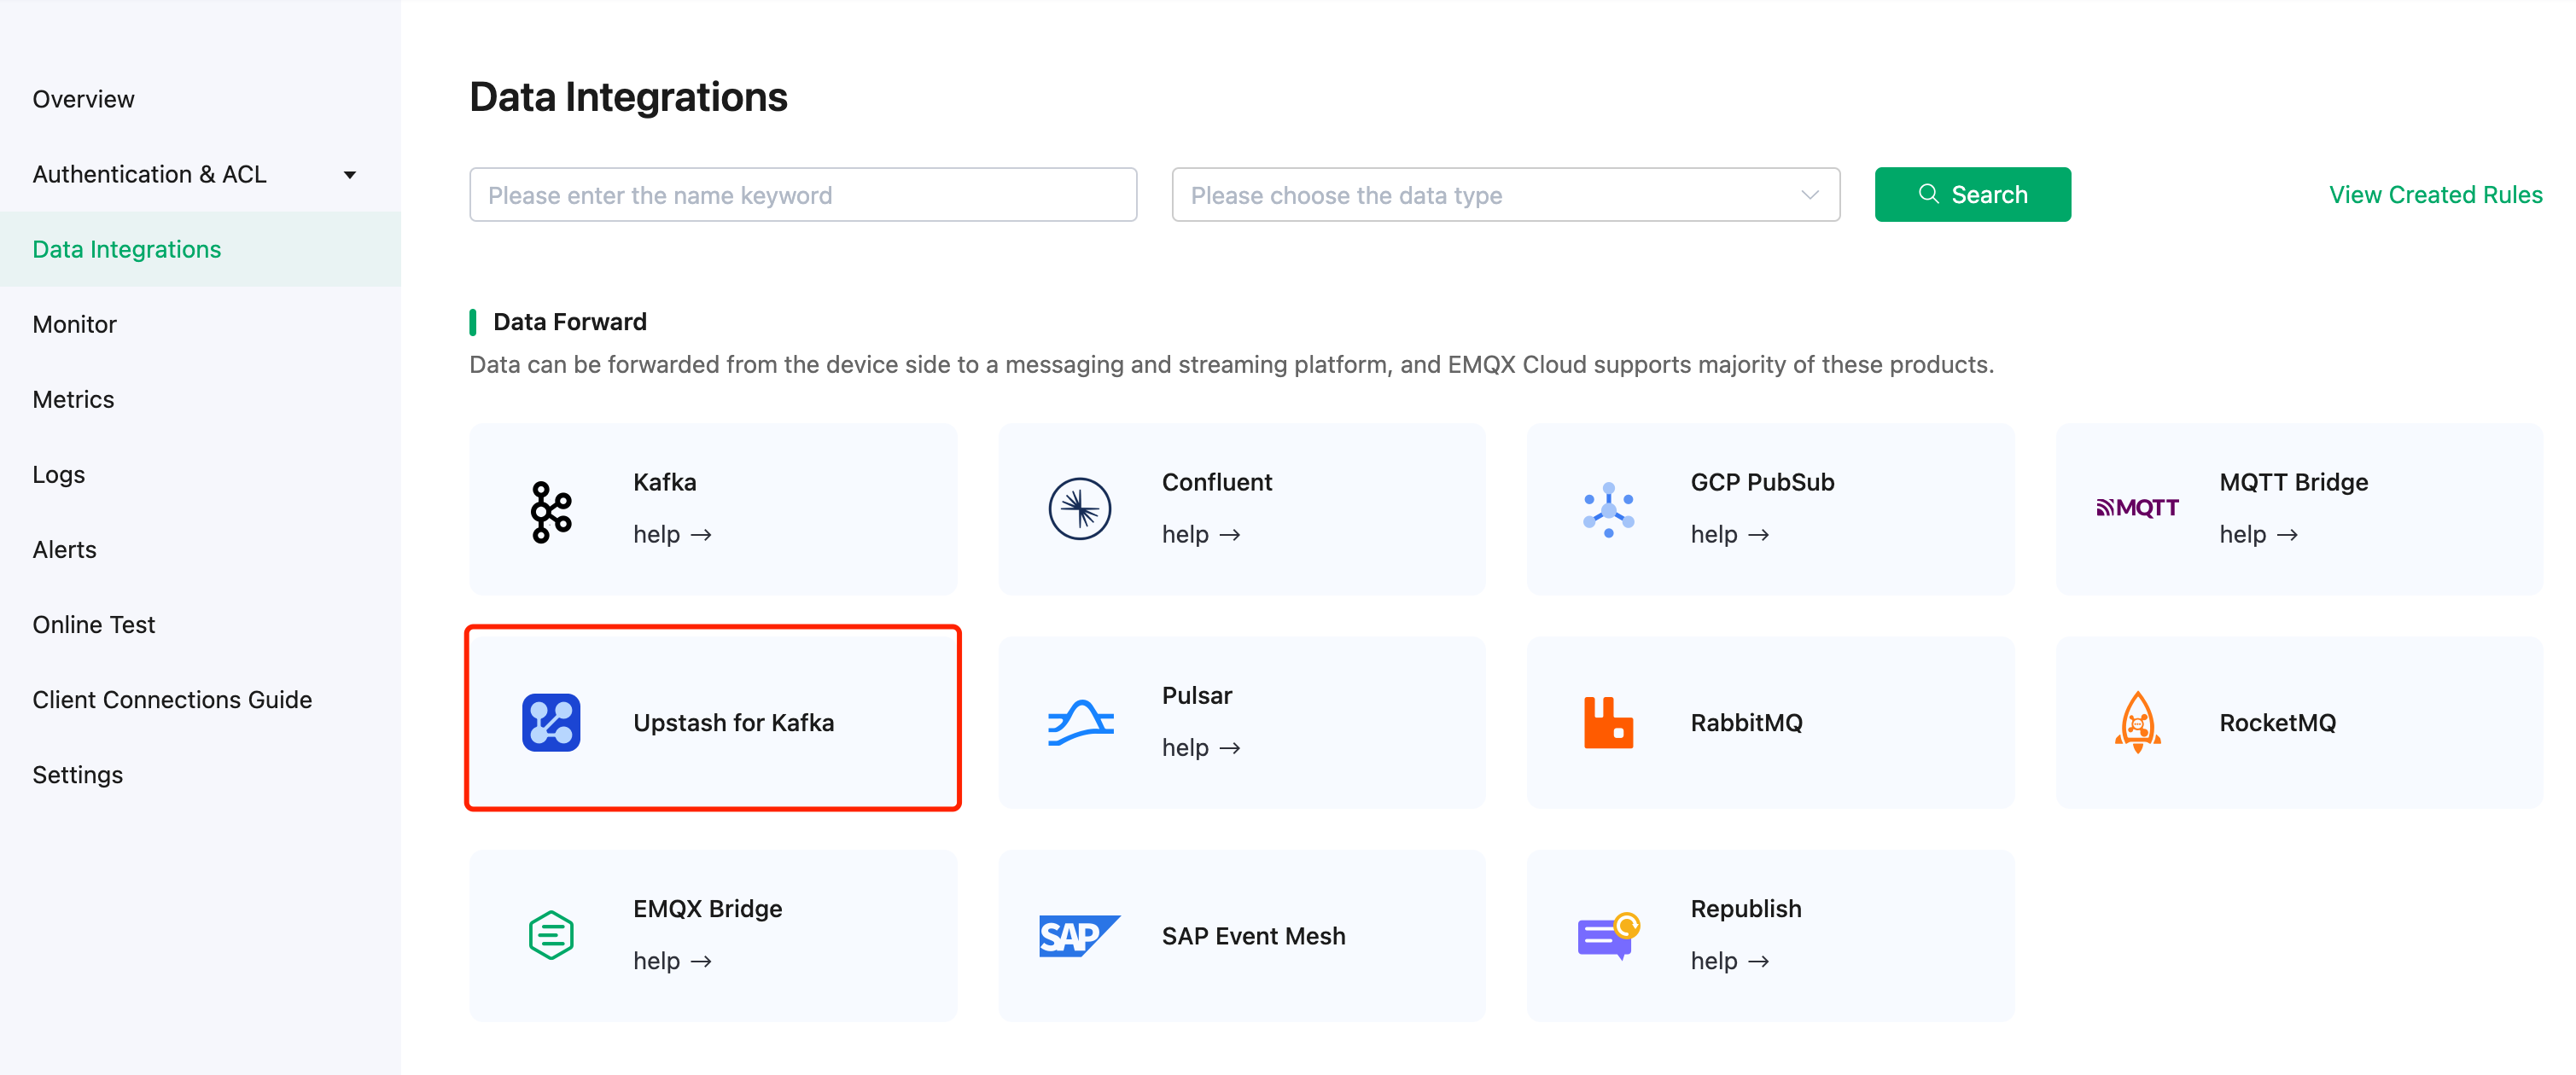
In the EMQX Cloud console, under your deployment, go to Data Integrations and select Upstash for Kafka.
-
Fill in the Endpoints details from the Upstash Cluster details into the Kafka Server fields. Insert the username and password created in Create Credentials into the respective fields and click Test to confirm the connection.
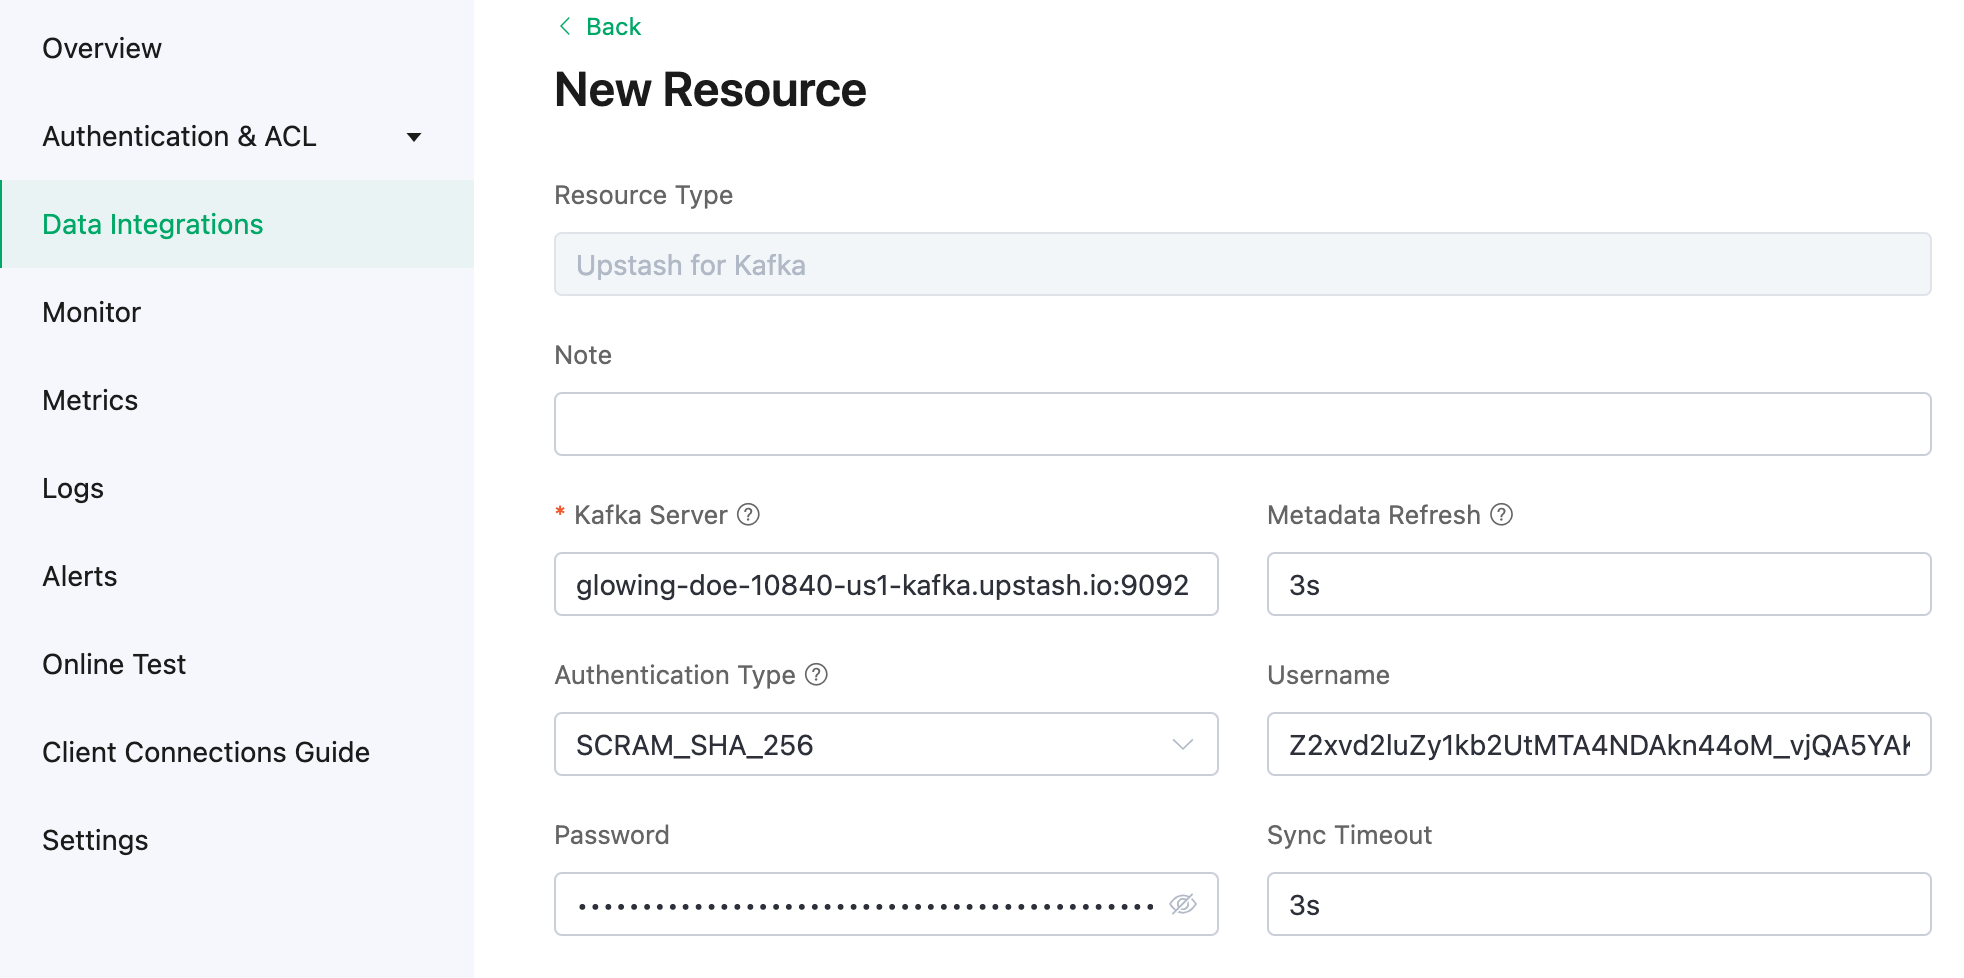
- Opt for New to add a Kafka resource. You’ll see your newly created Upstash for Kafka listed under Configured Resources.
-
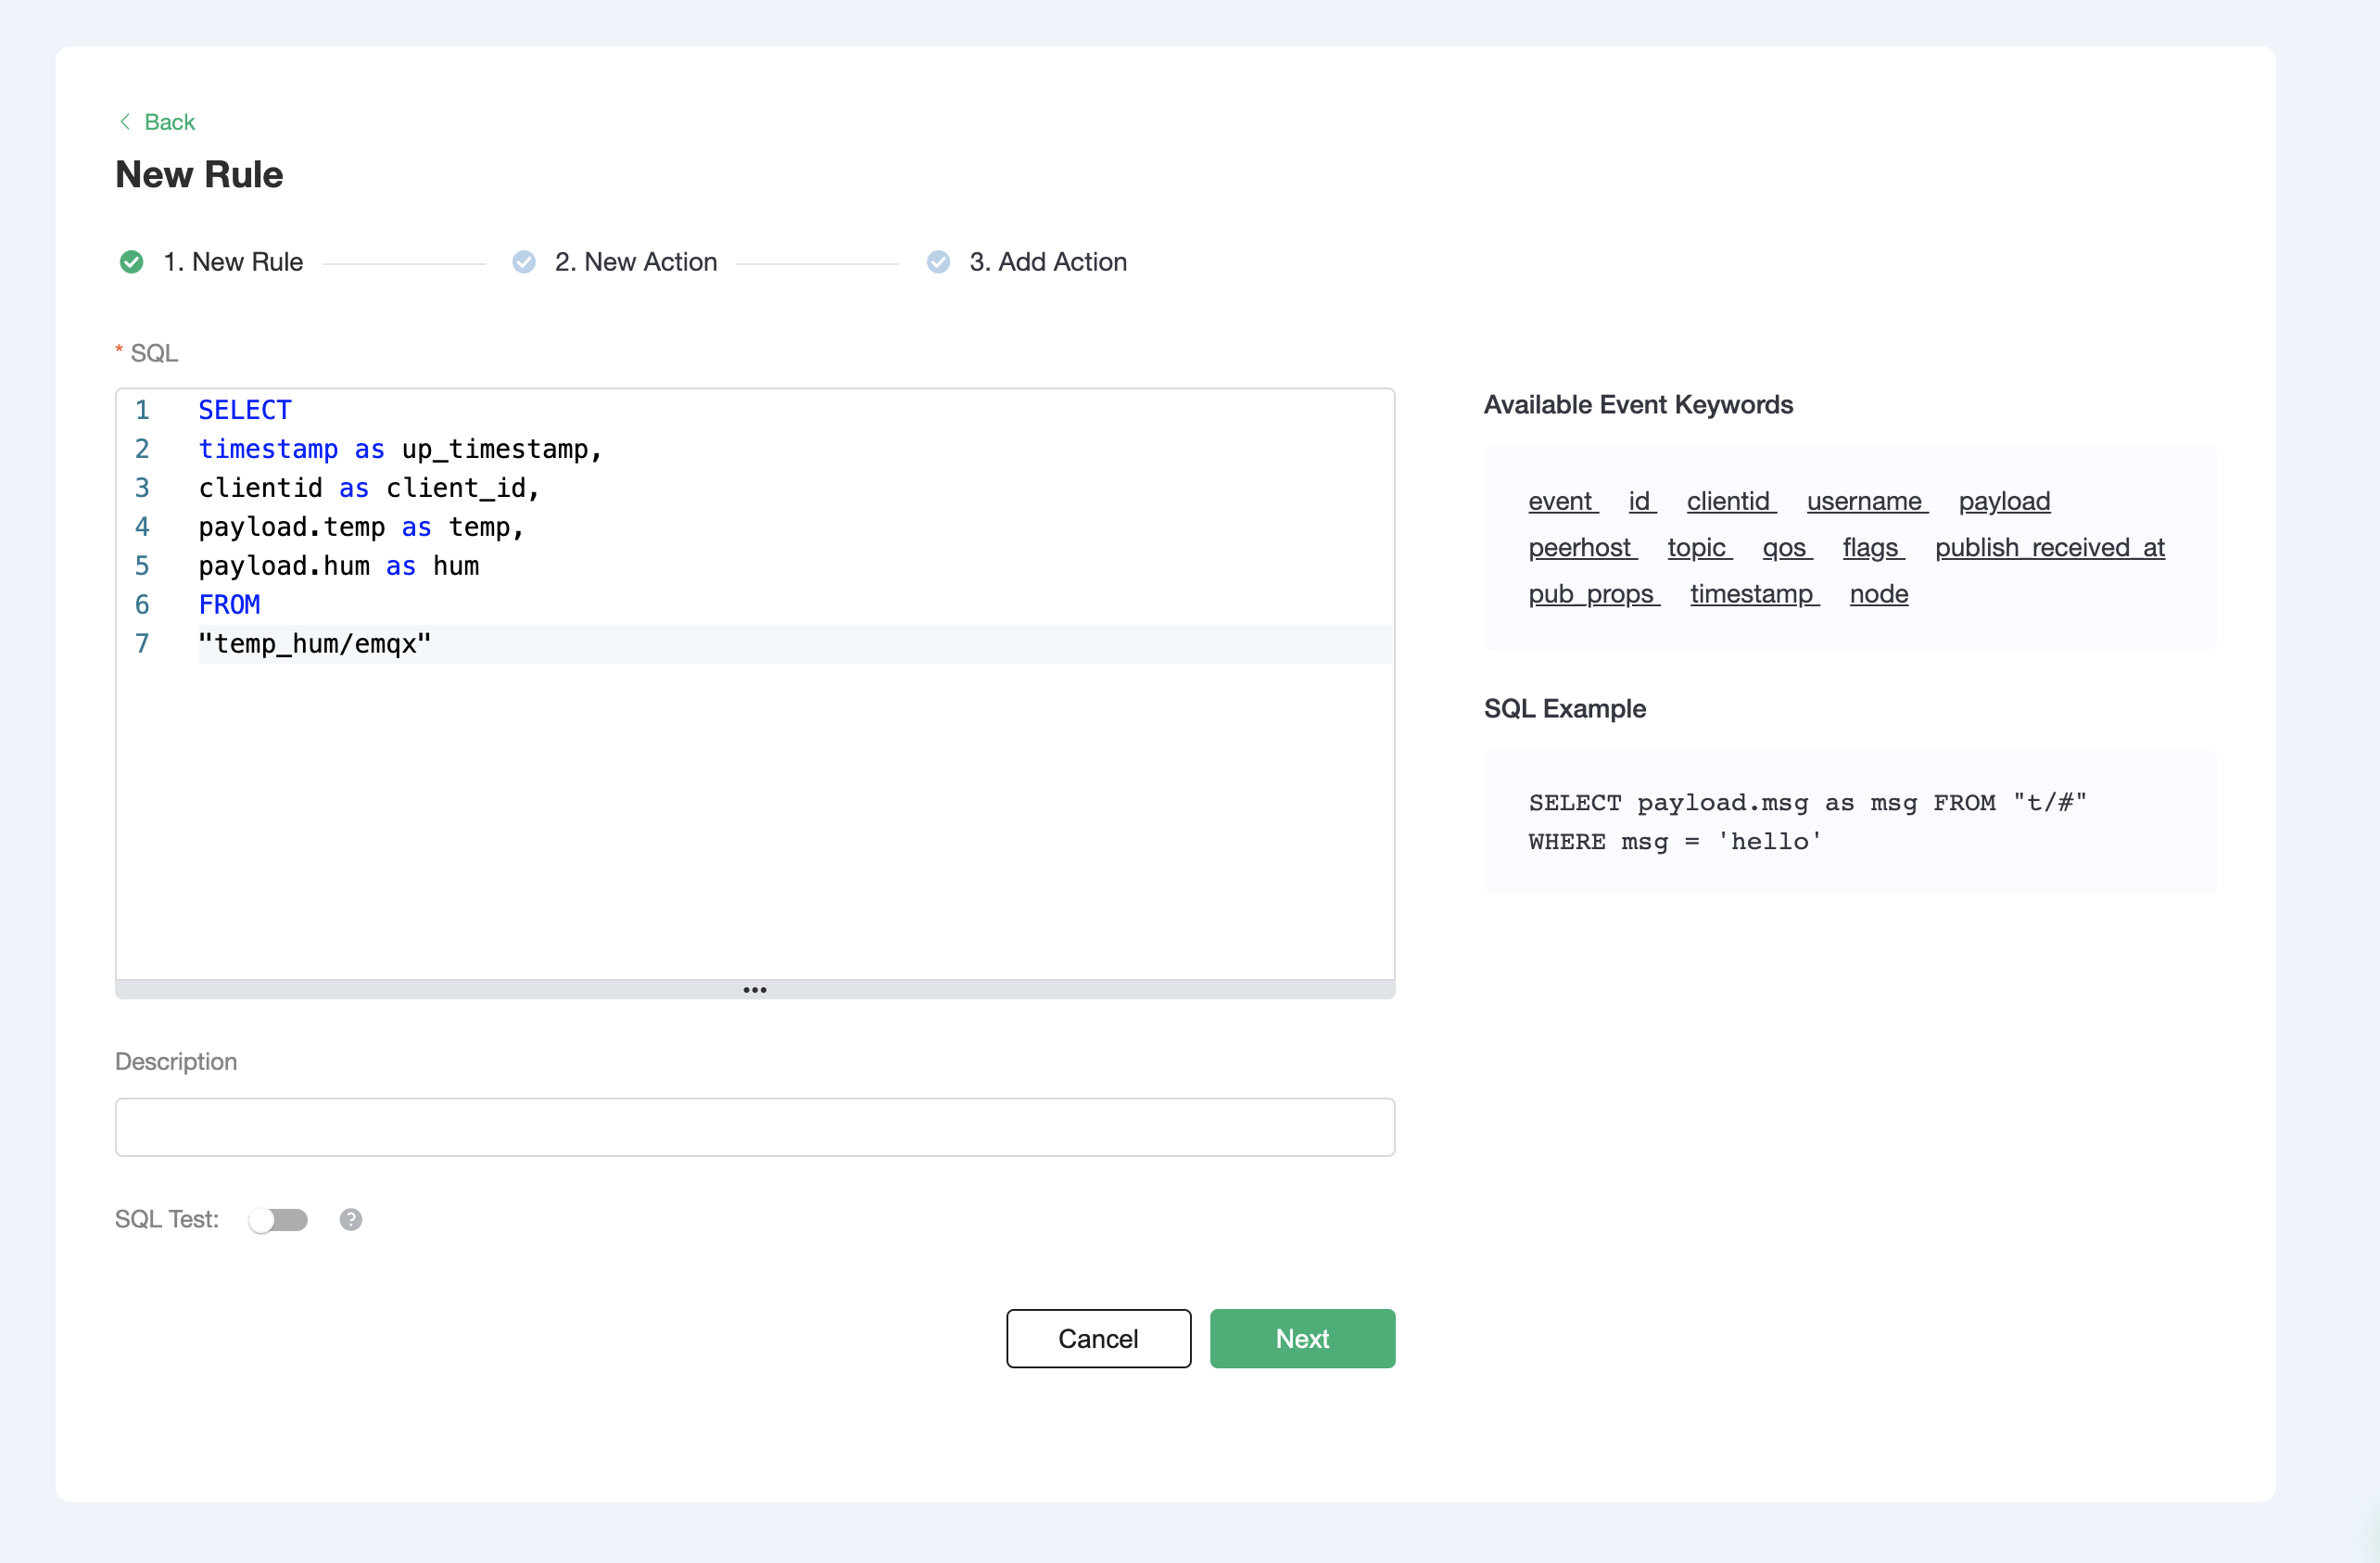
Formulate a new SQL rule. Input the following SQL command in the SQL field. This rule will process messages from the
temp_hum/emqxtopic and append details like client_id, topic, and timestamp.
-
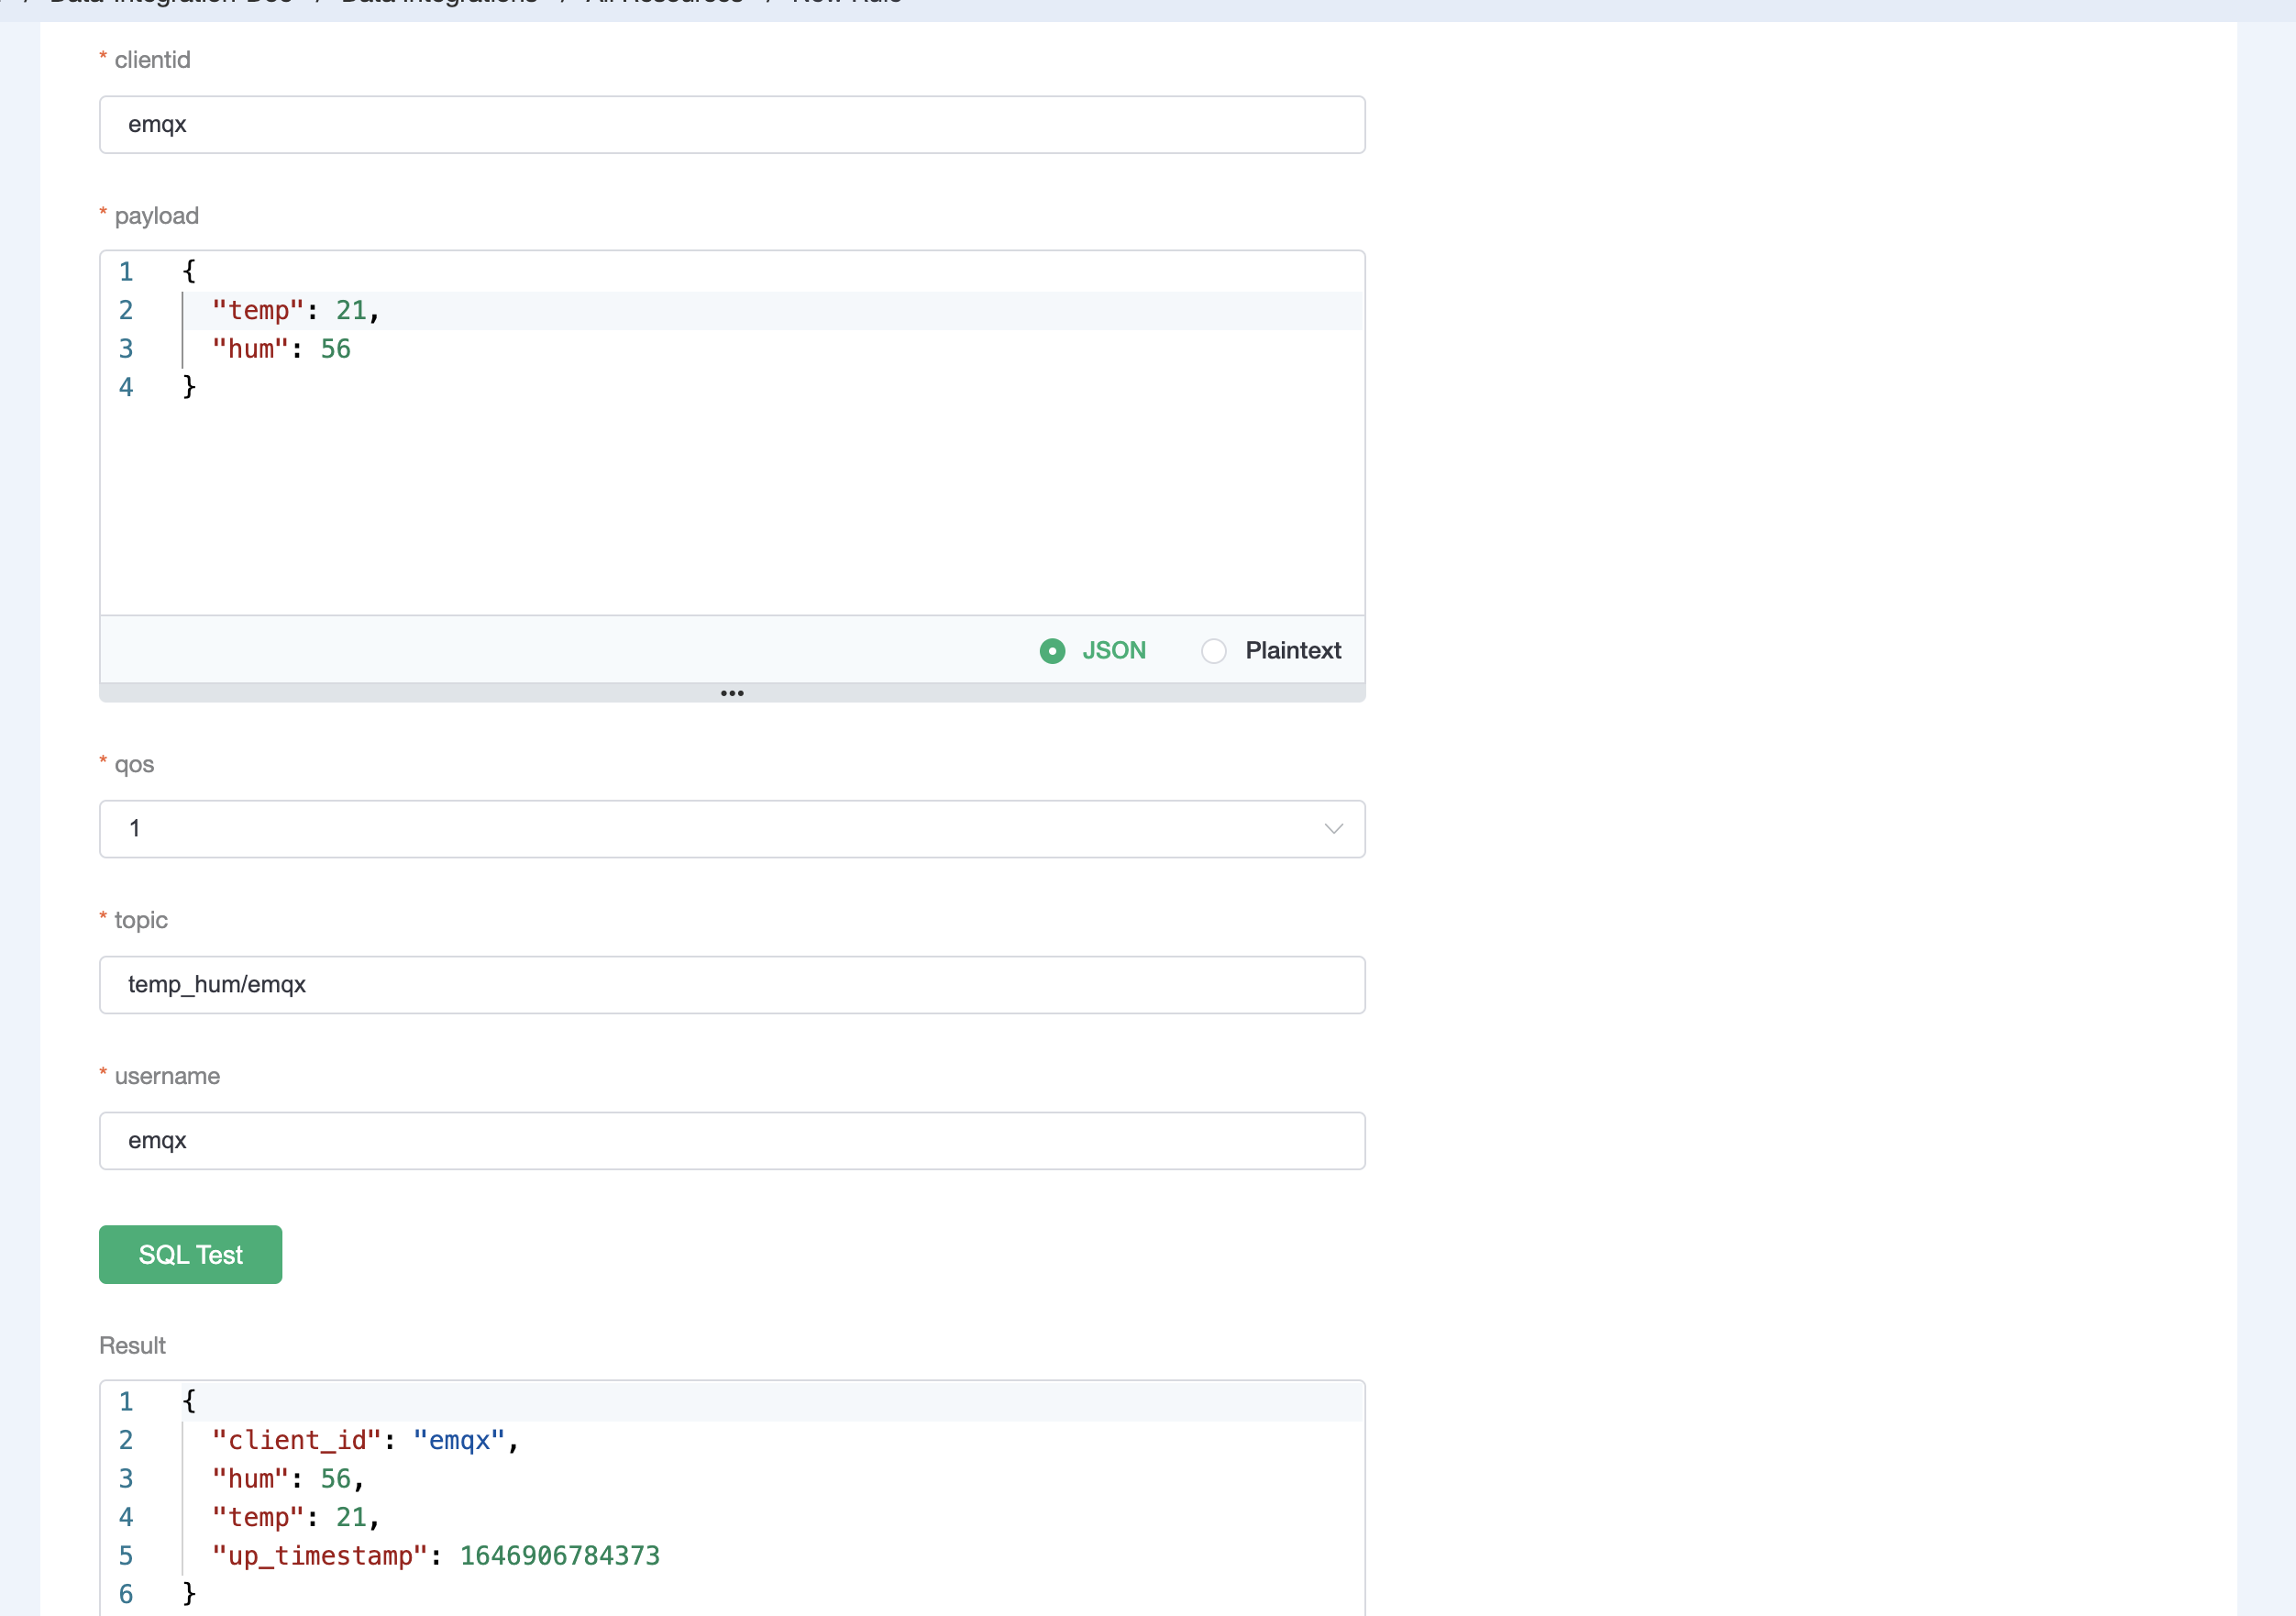
Conduct an SQL test by inputting the test payload, topic, and client data. Success is indicated by results similar to the example below.
- Advance to Next to append an action to the rule. Specify the Kafka topic and message format, then confirm.
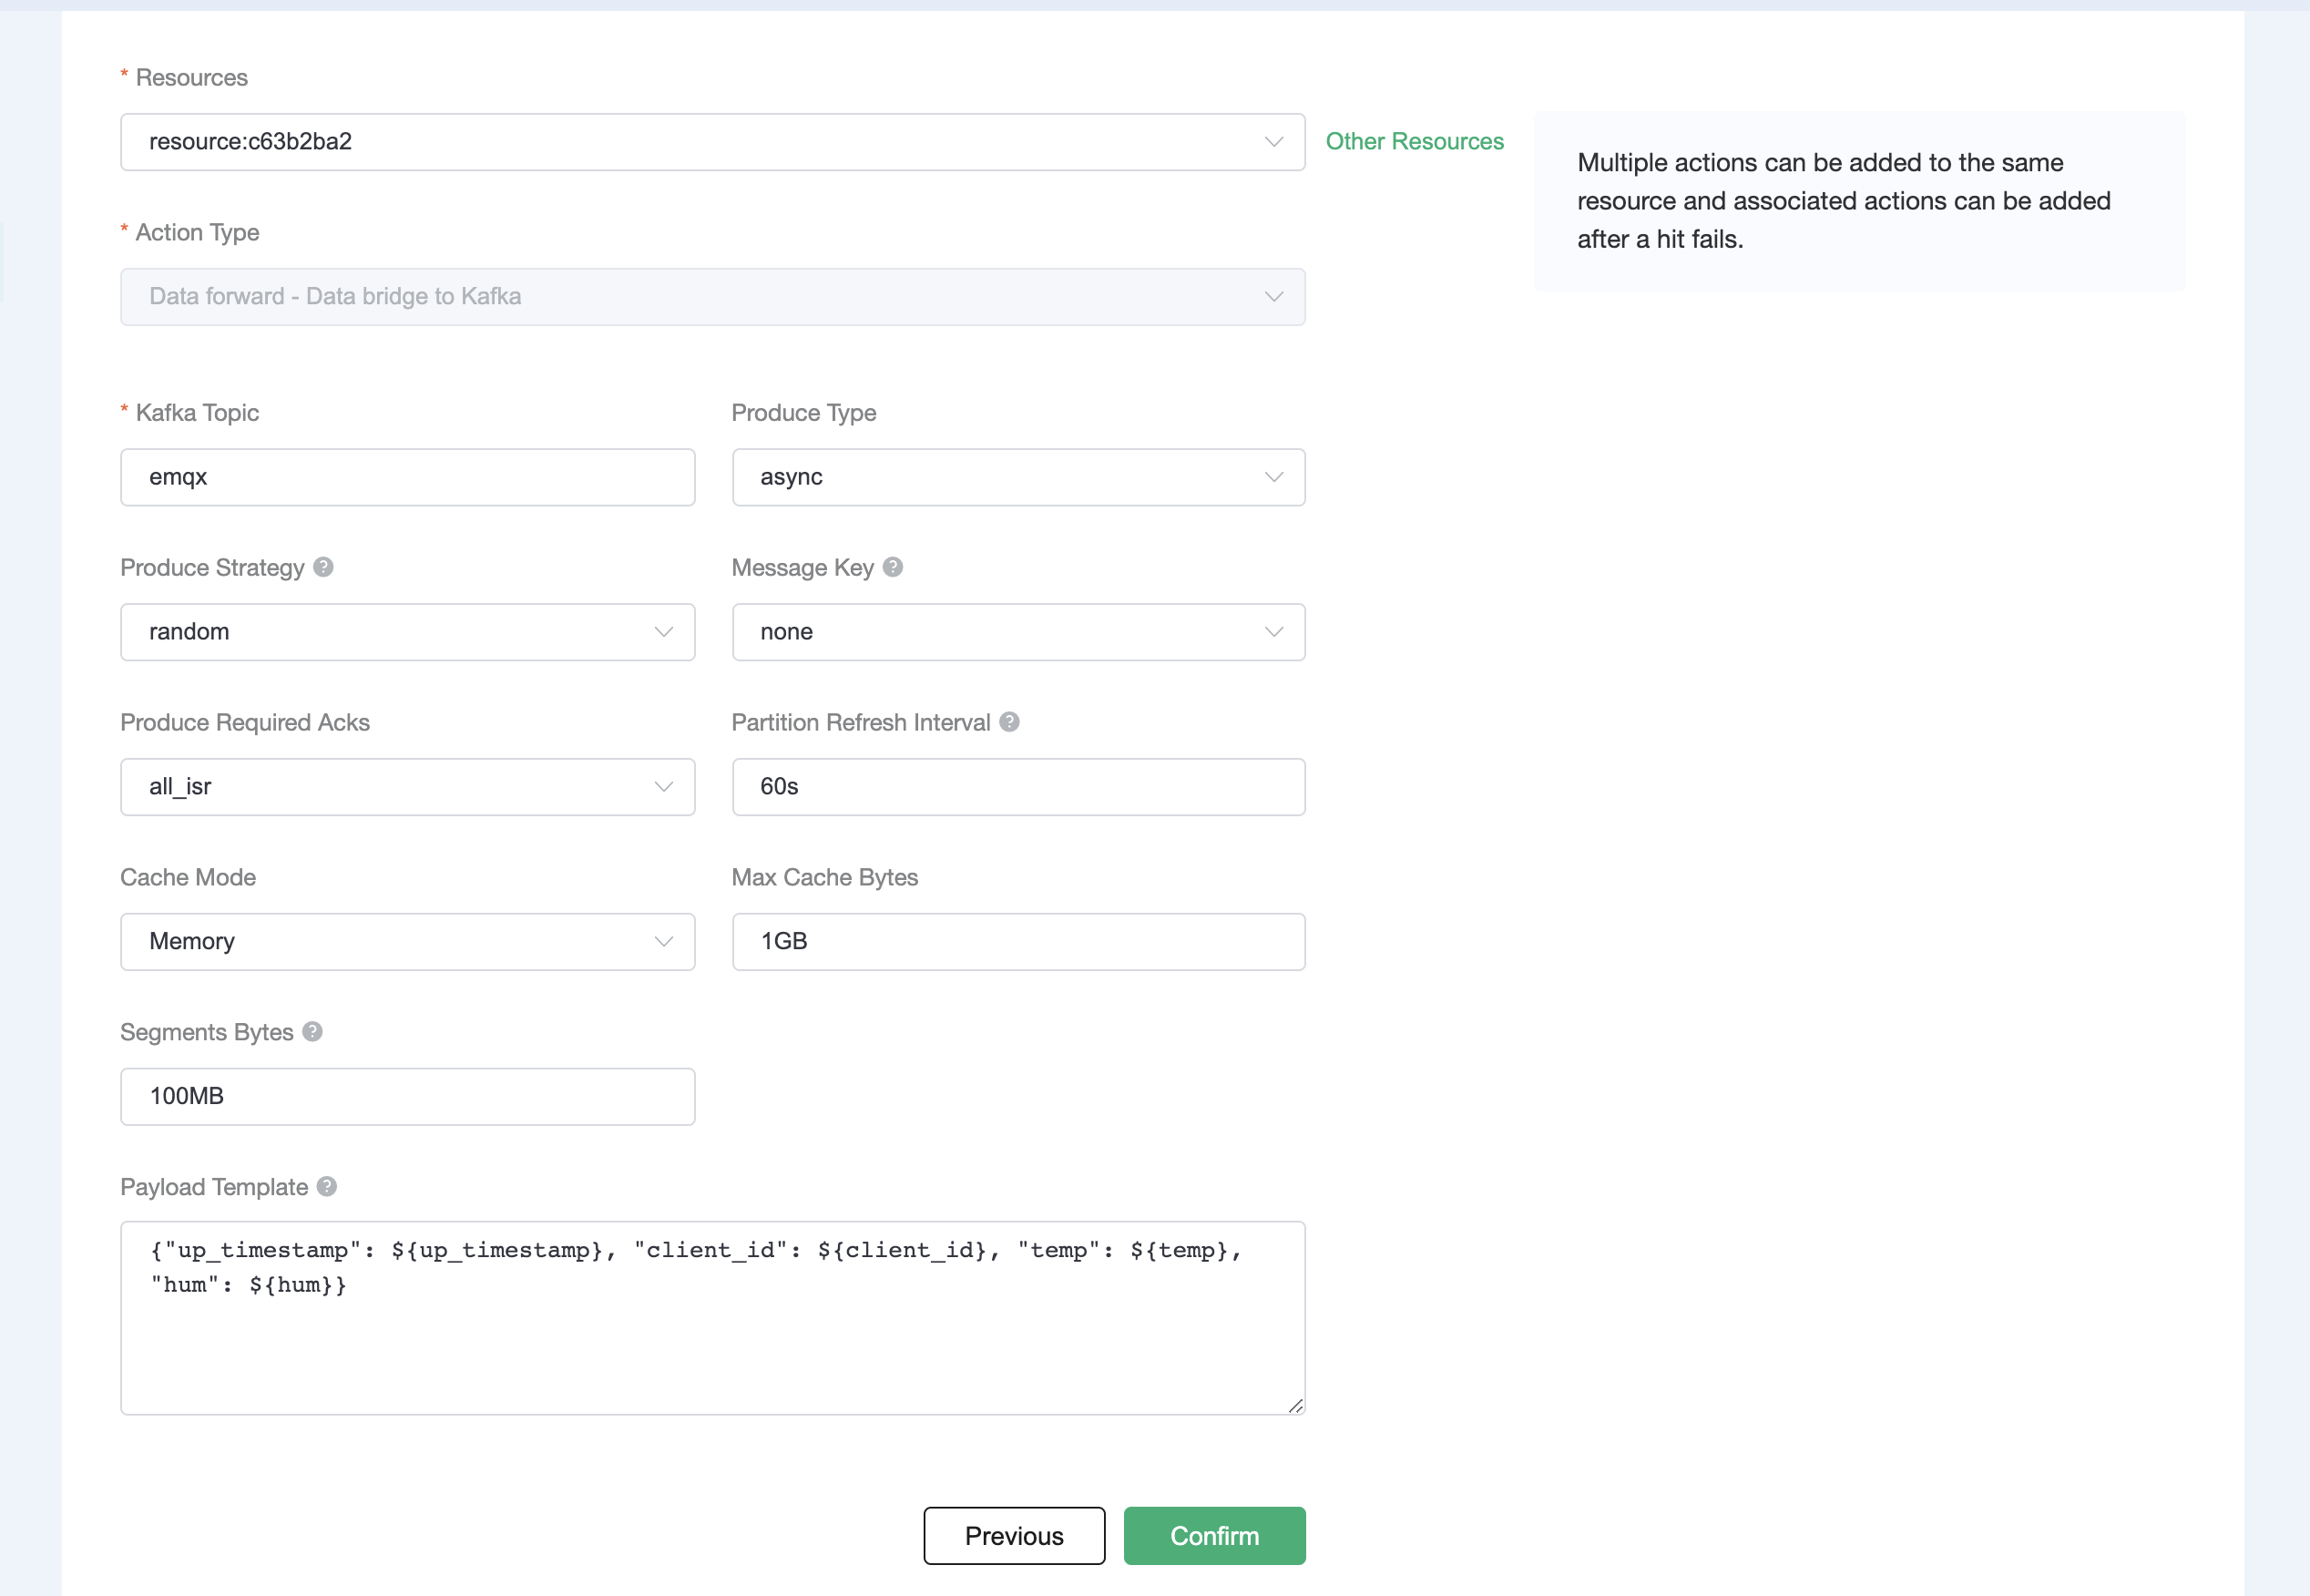
- View the rule SQL statement and bound actions by clicking View Details after successfully adding the action.
- To review created rules, click View Created Rules on the Data Integrations

